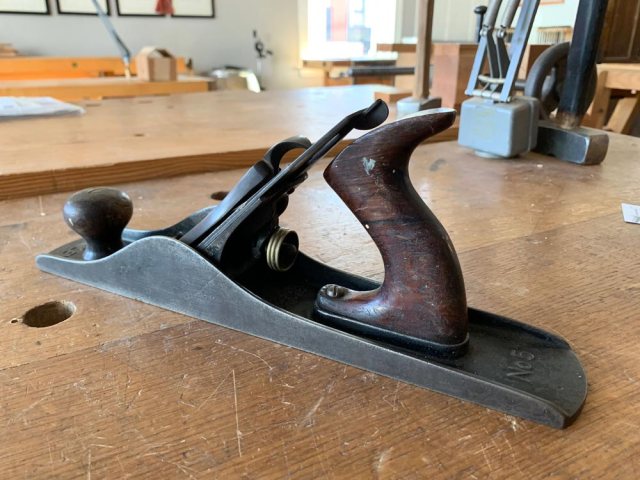
For me, the jack plane is as essential as the hatchet is to a green woodworker. Or a drawknife is to a traditional chairmaker. The jack plane (sometimes called a fore plane) gets furniture parts to shape in a huge hurry, and with only a little effort.
Most woodworkers who show up at our door don’t have a proper jack plane. Their tools might look like jack planes, but they’re set up all wrong (basically, like big old block planes). Whenever we can, we take these woodworkers out back to the shed. Not for a whuppin’, but to the grinder, where we can transform a store-bought 14”-long bass-boat anchor into a tool that can work small miracles in wood.
I think it’s a simple process. But I want to present it in small steps and in detail so that anyone – even those at the beginning of the craft – can do this. Let’s begin by buying the right plane.
Too Much, Too Little
It’s easy to spend either way too much or way too little when buying a jack plane. If you have the cash, it’s tempting to buy a premium plane from Lie-Nielsen, Veritas, Wood River or Clifton.
I wouldn’t.
Doing so is (in my opinion) a huge waste of your money and the toolmaker’s effort. Plus, it’s like fishing with an ICBM. You can indeed trick one of these beauties into slumming as a real jack plane. But the premium tool was designed and manufactured to do so much more, so it’s just a cosmic and comic waste.
It’s also tempting to go to Harbor Freight and purchase this $14.99 miracle of pot metal and skin-lashing plastic. Or to go to eBay.com and pick out an old Stanley No. 5 that came from the bottom of the sea. Or sneak into Cracker Barrel and remove a wooden-bodied jack that’s affixed to the walls with Torx screws.
For the love of hashbrown casserole, please do none of these things.
The dirt-cheap planes from Grizzly, Anant, Harbor Freight and all the other overseas makers are trouble with a capital Chromium. Their cutting irons (and I’ve sharpened a lot of them) are banana-shaped, inconsistently heat-treated and alloyed with anti-rusting elements that make them as pleasant to sharpen as a lemon gummi bear.
Usually the handles of these planes are plastic or poorly shaped wood that will – without any additional assistance – make you hate handplaning. And the machining on the tool is usually crap, as well. I’ve handled hundreds of these planes since the late 1990s, and they don’t ever seem to get better or worse.
As to wooden-bodied planes, I love them. Adore them, in fact. But they don’t tend to survive well over time. Thanks to wood movement, abuse or being plumb wore out, their wedges don’t hold well. Or they hold too well. And they just need a lot of love to get them working. Yes, you can do it. No, it’s not as hard as hippocampus surgery. But for your first plane, I recommend you get an early Stanley No. 5 jack plane with an iron body.
Wait, Don’t These Stanley Planes Stink?
Stanley has made planes that rival both Lie-Nielsen and Harbor Freight. It just depends on who was running the company at the time. In general, early planes (made before World War II) are nicer than later planes (made after the war). But very early Stanley planes can be problematic as well because they are missing key innovations, or they have odd (read: hard-to-find) replacement parts.
For me, the sweet spot is Stanley planes made somewhere from about 1902 to 1924. That sounds like a small window of time, but Stanley made a lot of planes during that period, and lots of them survive.
And they are reasonable – a good one is $30 to $40 on eBay (less if you buy it at a Mid-West Tool Collectors Association meeting).
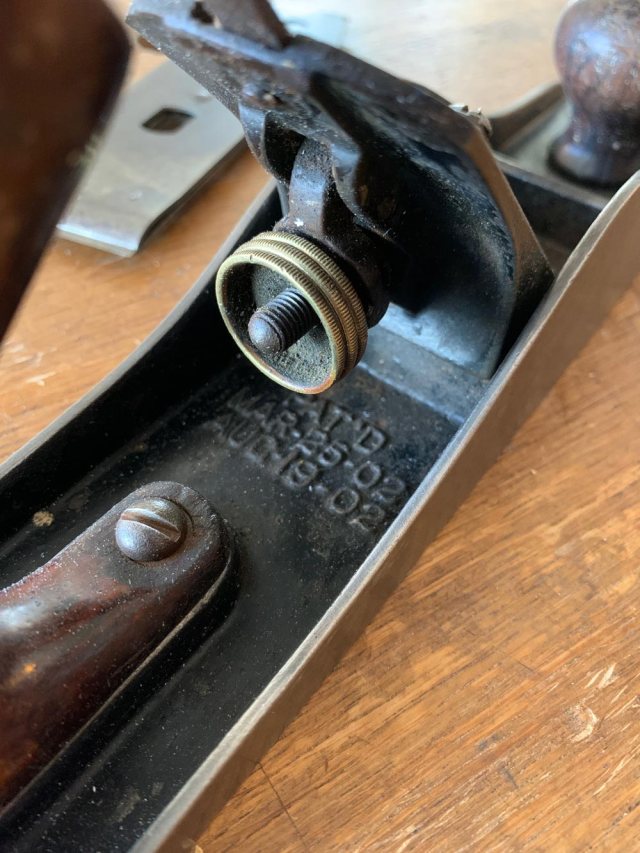
To learn to date a plane (I mean to find out its age; not its turn-ons), I recommend you become familiar with one of the many handplane dating charts. Here’s the quick-study guide: buy a plane that has one, two or three patent dates cast into the tool’s body, right behind the frog.
Once you’ve spotted one of these planes, look for the obvious. Are the handles beautifully shaped rosewood? Uncracked and unsullied? Is the tool rusty? Are large hunks broken off its body? (Basically, it’s like searching for a human mate.)
One caution: If an old tool looks like it’s brand new, my instinct is to skip it. If it is indeed perfectly preserved and functional, it will likely be expensive. If it has been “restored,” the previous owner might have “over restored” it, removing metal that you’d rather still have. Third option: The tool has always been defective/cursed and has frustrated every user who has picked it up.
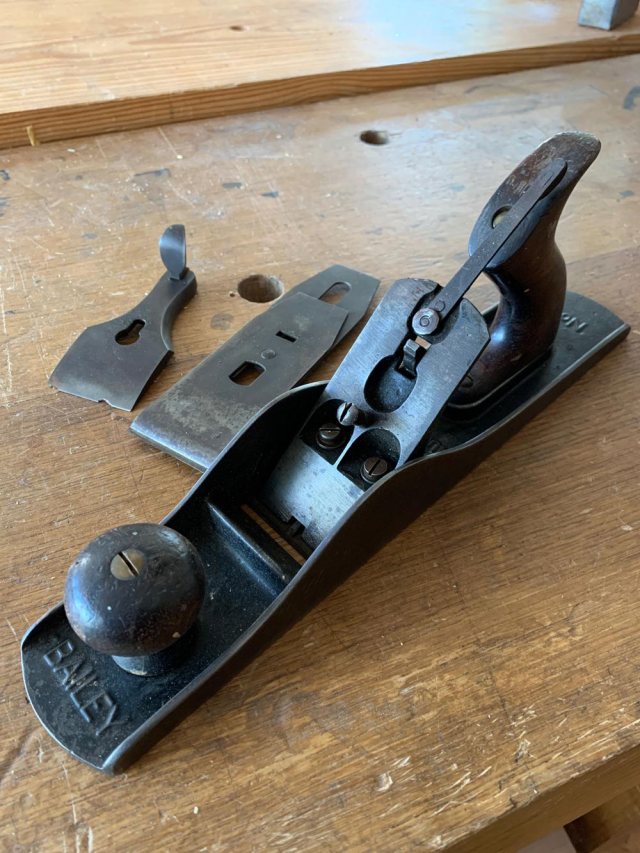
There are lots of these tools out there. So, don’t get frustrated if you can’t find the one you want after 10 minutes of scrolling. I purchased the tool shown in these photos for less than $40, and I overpaid a bit to get one that looked especially clean.
Avoid Replacement Parts
It’s tempting to buy a jack with a missing part, a cracked tote or an incorrect knob and think: I’ll just buy a replacement part. Parts are out there, but their costs (plus shipping) add up quickly. My experience is that it’s best to wait patiently for a sound example with all its bits intact.
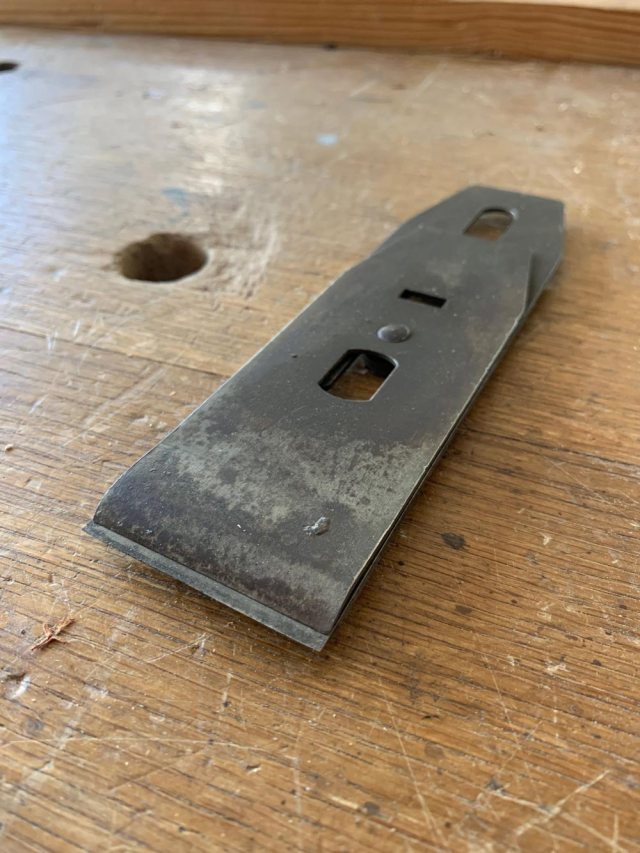
That includes the iron and chipbreaker/cap iron. Many woodworkers replace these instinctually. While that might be a good idea for a smoothing plane (or it might not…), it’s rarely necessary for a jack plane. Plus, I have found that Stanley’s old irons – if they haven’t been abused – are easy to sharpen and tend to stay that way. Plus, they fit the tool without any fuss. So, look for an iron with a lot of life left in it, and a chipbreaker that isn’t dogmeat.
Last word on replacing parts: It’s tempting to embark on making your own replacement front knob and tote before setting up the plane for use. I recommend you do that after you have surfaced 100 boards with the existing handles. By that time, you will know if you like the handles and how you would change them (and you’ll probably notice that you can’t improve much on Stanley’s early handle designs).
Bottom line: Don’t waste your money. Invest a little in an old tool that has been cared for and the next steps will be easy.
— Christopher Schwarz
Coming Up
Clean & True Critical Surfaces: Part 2
Grind the Iron & Fit the Chipbreaker: Part 3
Set Up & Use: Part 4