Discover the power of Gridfinity – the open-source 3D printing system developed by Zack Freedman. At Portland CNC, we’ve been using Gridfinity to organize and standardize our shop. We’ll share tips, our models, things we use, and print settings – also how we use Gridfinity.
WAYS TO SUPPORT US
What is it?
Gridfinity is, “The modular, open-source grid storage system for your workshop.” It’s a simple expandable and open-source system for all kinds of organization and order.
How we use it
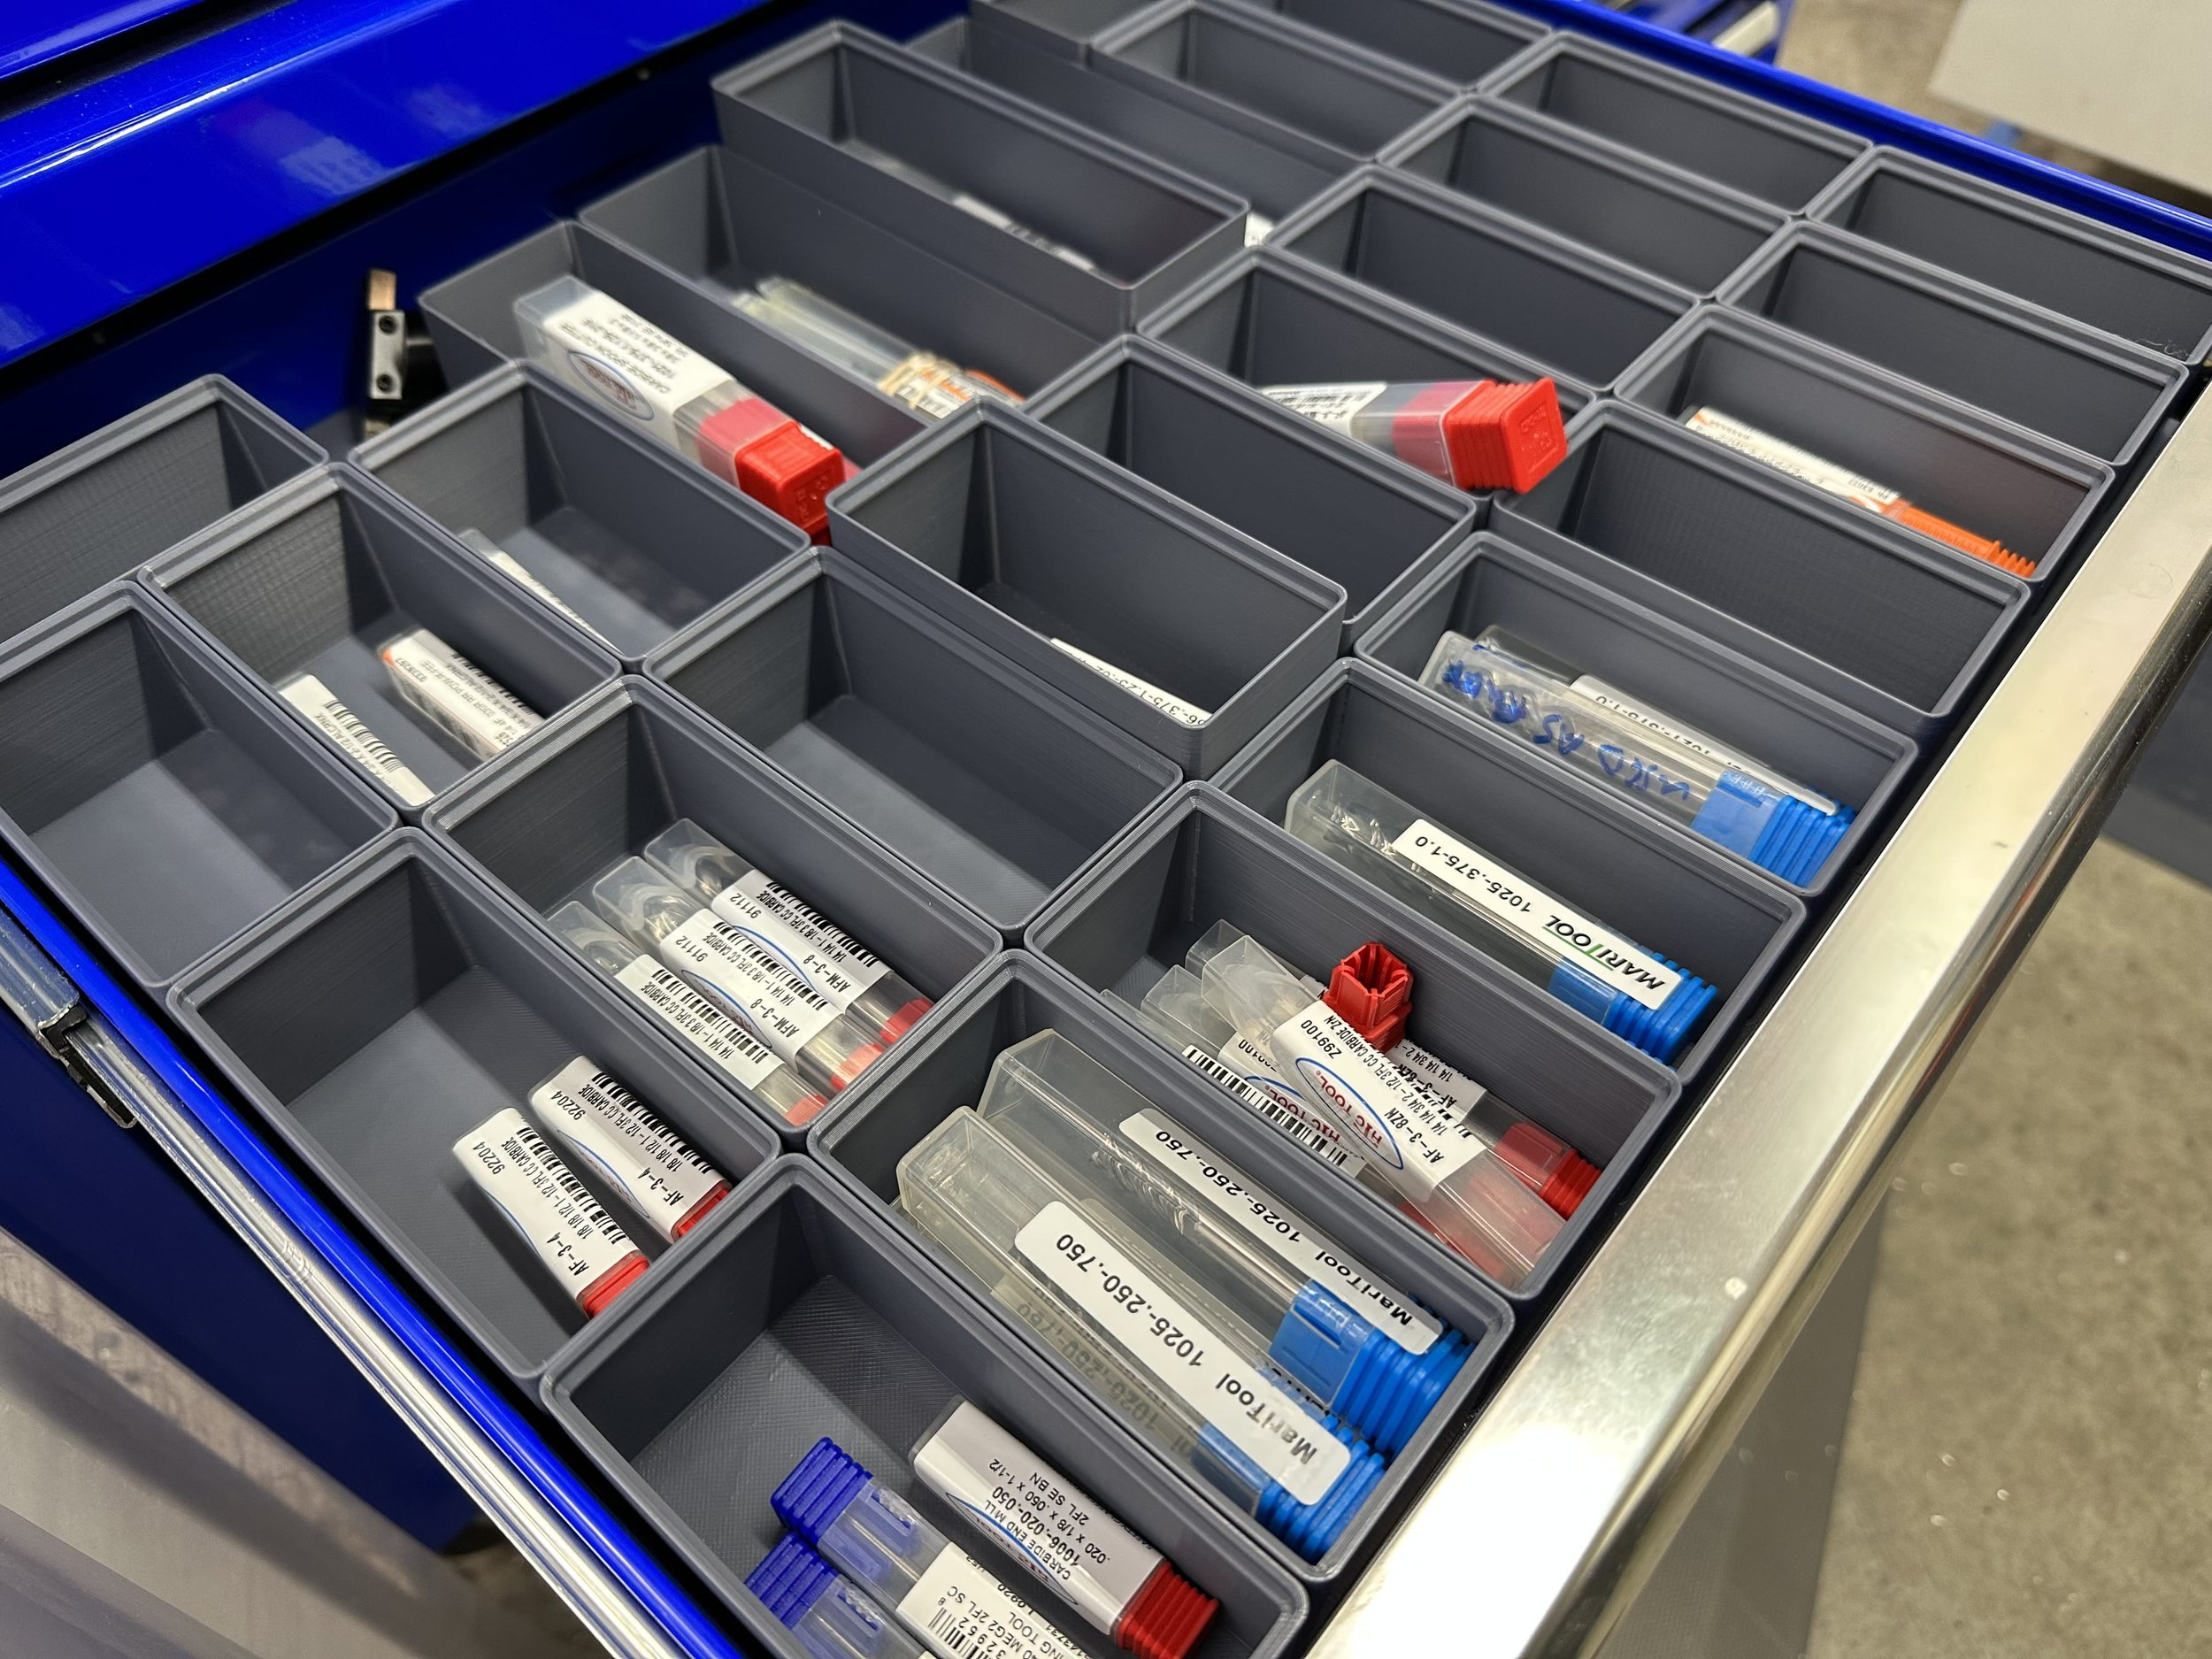
Our first foray into Gridfinity is for our CNC tooling drawers – it’s perfect for that. Previously we used “grid-less” bins which were okay but slid around in the drawers and had no overall structure. They also aren’t stackable and had no direct way to add labels.
We actually use a 50mm grid – which makes using found models a bit harder to use. Sometimes they include a parametric Fusion 360 file, often it doesn’t. (We try to provide parametric files for all our models). Why 50mm? It wasted less space in our tooling drawers than the standard 42mm did.
“marqueeItems”: [ {
“text”: “🟠 Update: Fusion 360 Add-in”
} ],
“linkTo”: “”,
“waveFrequency”: 2,
“waveIntensity”: 30,
“animationDirection”: “left”,
“animationSpeed”: 0.5,
“pausedOnHover”: true,
“fadeEdges”: true,
“textStyle”: “heading-1”,
“textSize”: {
“unit”: “rem”,
“value”: 1.5
},
“itemSpacing”: {
“unit”: “em”,
“value”: 1.0
},
“blockId”: “yui_3_17_2_1_1686331578289_32301”,
“estimatedDimensions”: {
“estimatedColumnSpanDesktop”: 12,
“sectionColumnsDesktop”: 12,
“estimatedColumnSpanMobile”: 12,
“sectionColumnsMobile”: 12
},
“containerStyles”: {
“backgroundEnabled”: false,
“borderRadii”: {
“topLeft”: {
“unit”: “px”,
“value”: 0.0
},
“topRight”: {
“unit”: “px”,
“value”: 0.0
},
“bottomLeft”: {
“unit”: “px”,
“value”: 0.0
},
“bottomRight”: {
“unit”: “px”,
“value”: 0.0
}
},
“padding”: {
“top”: {
“unit”: “%”,
“value”: 3.0
},
“right”: {
“unit”: “%”,
“value”: 0.0
},
“bottom”: {
“unit”: “%”,
“value”: 3.0
},
“left”: {
“unit”: “%”,
“value”: 0.0
}
},
“stretchedToFill”: false,
“backgroundColor”: {
“type”: “THEME_COLOR”
}
},
“featureFlags”: {
“useCLDRMoneyFormat”: true
}
}
🟠 Update: Fusion 360 Add-in
🟠 Update: Fusion 360 Add-in
🟠 Update: Fusion 360 Add-in
Since originally publishing this article we’ve found a wonderful free Fusion 360 add-in that lets you generate all kinds of customized Bins and Bases. Check it out below.
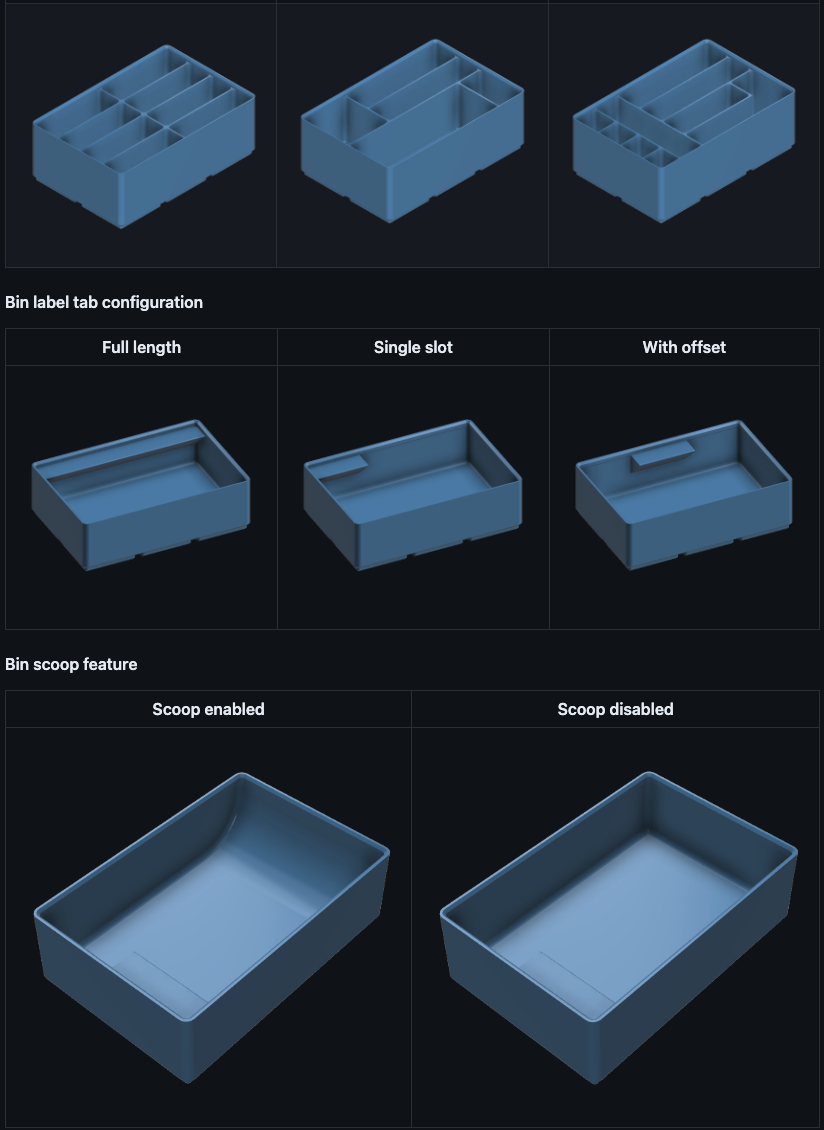
Fusion 360 Add-in
✅ Fantastic Fusion 360 Add-in to Generate Bases and Bins
Tips
-
Need a new thing? Look for it online first.
-
Search on Thangs.com – it searches all across a bunch of downloadable sites at once.
-
Doesn’t exist? Start with an existing model and revise from there. It’s faster.
-
Everything doesn’t have to be 3D printed – You can laser cut, CNC or, skip the Grid bases altogether if they aren’t for you.
-
Magnets are optional as well.
-
Be generic or specific, both work.
-
We use CA Superglue for gluing base grids together.
Printing 8 Gridfinity bins at a time on the Bambu X1C
Print Settings
-
0.2mm layer height
-
Infill: 8% gyroid
-
No Brim, No support (unless you use screws or magnets on bottoms of bins)
-
PLA filament
Things We Use:
-
Prusa MK3S+ or Bambu X1C printer
-
PLA or PETG
-
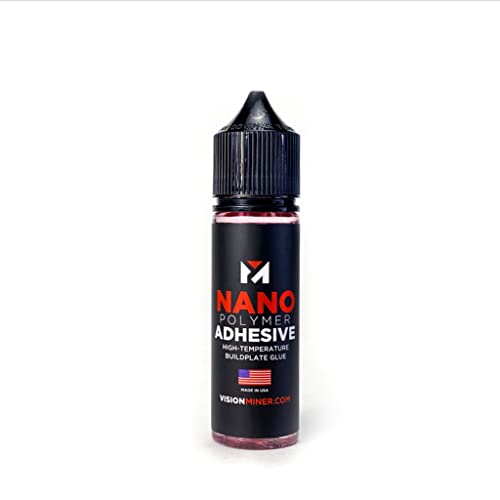
Nano Adhesive – waaaaay better than glue stick.
-
6mm Magnets
-
Deburring Tool for Plastic
-
Super Glue and Activator
Printable Models
Check Printables below to see all of our Gridfinity models. Some of the best collections:
-
Gridfinity
-
Kyle Warren’s Gridfinity Collection – See Screw Together Baseplate
-
DesignTheEverything’s Gridfinity Machine Shop Collection
-
Thangs.com Search for Gridfinity