Editor’s note: Here’s another great installment from hand-tool woodworker Dean Jansa. This one guides you through the process of moulding and assembling and ogree bracket foot.
The same chest that has the molding shown in “Sticking a Moulding” will have ogee bracket feet. Just like making a molding the first step is laying out the profile of the ogee on the edge of the stock.
Here’s a quick side-step: You’ll note the stock I’m using is made up of the primary wood laminated to a piece of pine. Not all period pieces used this laminated foot. If you choose to copy a piece without such a lamination, just ignore the pine in the photos.
The benefit of the lamination is the added strength it lends to the otherwise fragile “ankle” of the foot. That is, the area where the ogee sweeps inward. As you will see, without the lamination, this part of the foot can end up very thin after the ogee profile is cut with the hollows and rounds.
As with moulding, start with a single piece of stock long enough to cut all the feet for the chest. I’ll need six “foot parts” total. A pair will be mitered together for each front corner, and a single foot for the rear, for a total of six.
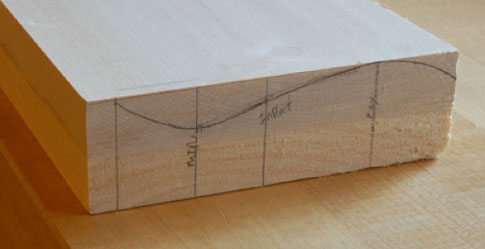
Lay out the desired profile on the end of the stock.
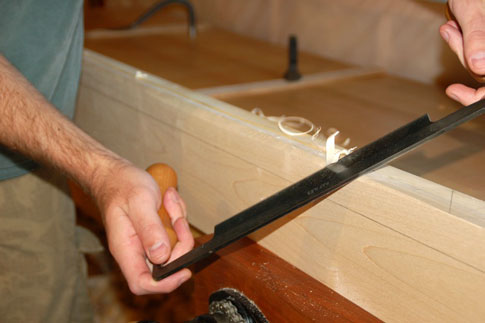
Remove as much waste as you can with a drawknife from the convex portion of the top of the foot. This is much faster than using a hollow to do all the work.
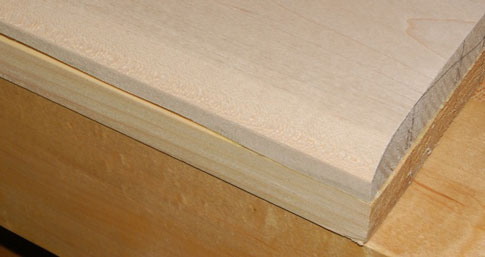
Clean up the profile with a hollow after removing the waste.
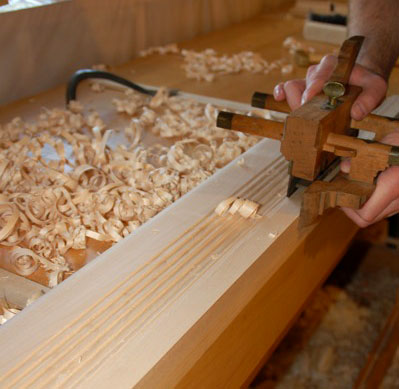
Next I create the concave portion of the ogee. I use a plow plane to remove waste from the concave portion of the stock, approximating the curve with a series of steps. The narrower the blade you use, the closer you can approximate the curve. But I find it is a balance, as too narrow a blade takes more time as you have many little steps to cut. Too wide and you are left with a lot of material to remove with the round plane. Your experience will be your guide. (Remember Riemann Sums from calculus days? Here’s a real world example!)
I work from the furthest point away from the bottom edge toward the bottom edge as my wooden plow has its depth stop on the left side of the groove it cuts. If you work with a metal plow you may want to work from the bottom edge toward the top of the foot as many metal plows have their depth stops on the right side of the groove they cut.
After the steps are cut, remove the edges of the steps with a chisel or gouge. In fact you can rough out the entire concave portion with gouges if you’d like. In maple I find it easier to use the plow to remove the bulk of the waste.
Here the majority of the concave portion is complete.
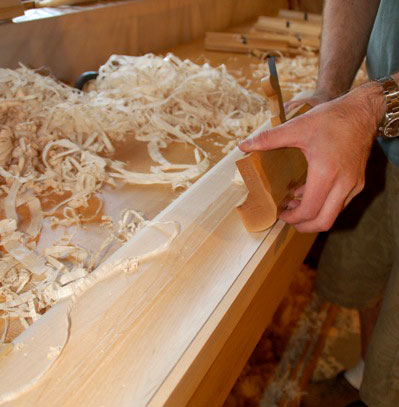
A little more round plane work gets you to the complete molding, ready to be cut into individual parts of the feet.
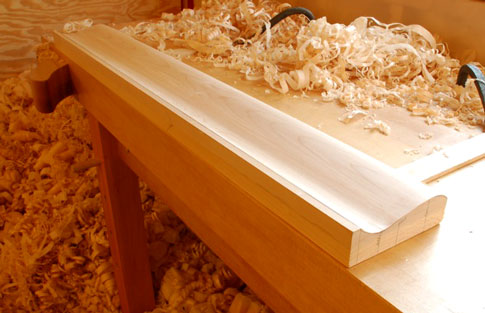
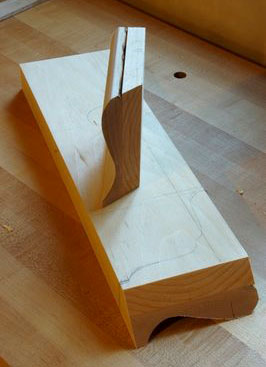
Mark the outline of the foot on the rear of the profiled stock and cut it with a turning saw.
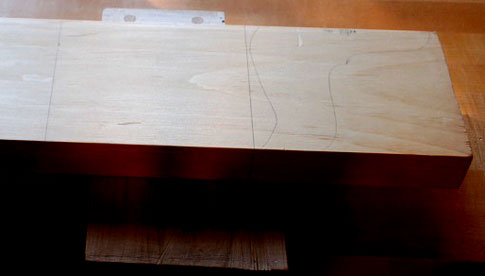
The rear feet are easy, no miters. The layout above shows the side profile of the ogee, but I will not cut out that profile, rather I just cut the rear-facing portion of the foot square. A little rasp work, and a rear foot is ready for a pine brace and glue blocks.
The front feet are mitered. I choose to cut and fit the miters before I cut out the profile of the foot.
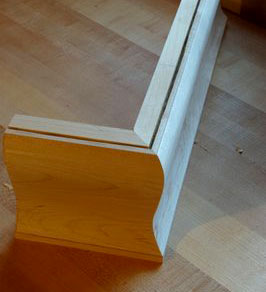
Fitting the miter first has its benefits and risks. The benefit: The foot profile will be full sized. If you cut the profile first you may have to remove some material when fitting the miter, making the feet slightly different sizes. The risk: You have to be careful not to damage the sharp edge left on the mitered edge while cutting out and shaping the foot profile. The benefit outweighs the risk for me, so I choose to fit the miters first and am vigilant while cutting and shaping the profiles.
There are options for cutting the profiles as well. Here I am cutting the profile with a turning saw.
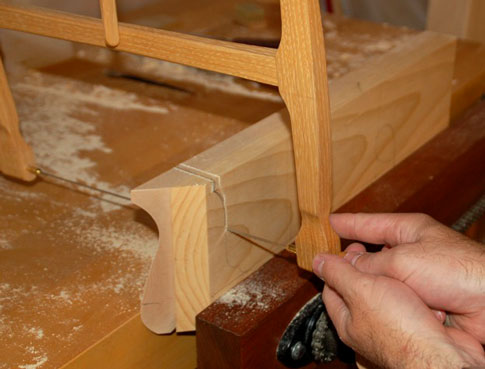
But if you look the foot below you’ll see evidence of a different method. Note the saw kerfs along the profile, most evident in the pine backing. Cutting the bulk of the waste with a hand saw and removing the rest with chisels and or gouges leaves such marks.
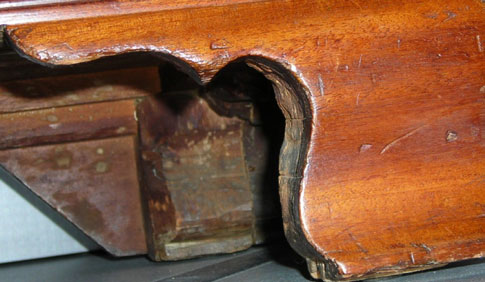
Having fit the miters and cut out the profile all that is left is the glue up. There are several methods seen in period work. Most common is to glue the miter and reinforce the foot with glue block with their grain running vertical. Here is a pine mock-up of the feet I’m working on, with vertical glue blocks and no lamination.
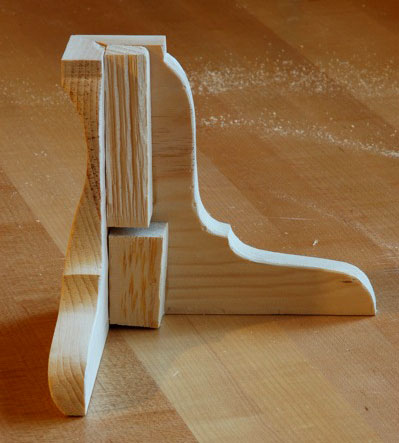
Now you can see why one may want to laminate the foot stock. Note how thin the foot is where the ogee sweeps inward. Add to this the crossgrain of the glue blocks and the result is a cracked foot at the thin point.
One solution to the crossgrain issue is to stack glue blocks so the grain is running the same direction as the feet. In the photo of the period piece above you can see the stacked glue blocks on the rear foot. This was a common feature of the Williamsburg area from the Scott Shop. Here are the stacked glue blocks on the front feet for my chest:
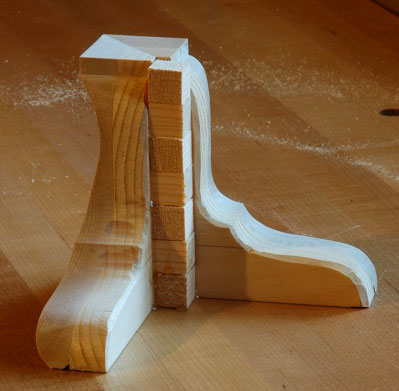
I’ll add on last small glue block when I complete all the feet. The chest really is supported by the glue blocks. Again, refer to the period piece above, you can see the glue blocks extend slightly below the bottom of the feet.
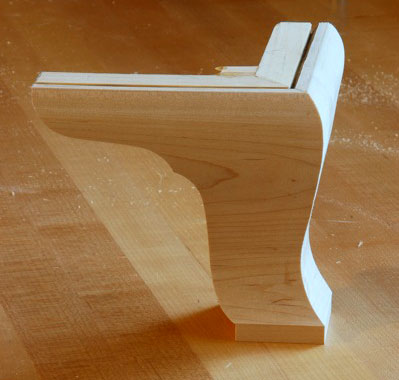
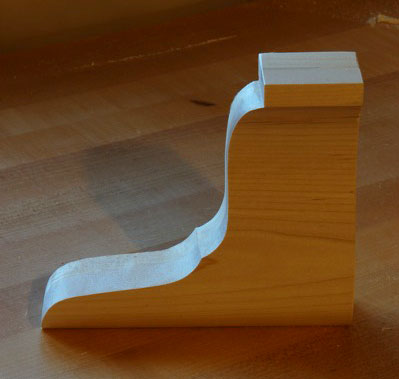
And here you have it – an ogee bracket foot ready to attach to the case.
— Dean Jansa