
My normal schtick on fixing up an old jack plane goes something like this:
Me (showing a jack plane to someone across the room): “Hey, does this sole look flat to you?”
Student: “Uh, I guess so?”
Me: “Then it’s ready to go to work.”
The above is a bit of hyperbole, but it is mostly true. Jack planes require the least amount of tuning to work really well. The reason? They take a coarse shaving, so the sole doesn’t have to be particularly flat for them to perform their duties. If you are in a hurry, you can usually grind and hone the iron and just go to work.
But I love my jack plane, and so I like to do a little work so that the controls move smoothly and the parts fit together nicely. If you think this is an admirable goal, read on.
Disassembly & Cleaning
Most jack planes have had a hard life and have had shavings and dust rammed into every possible orifice. A simple cleaning works wonders.
Take apart the entire plane. If something can be unscrewed, unscrew it. Remove the frog, the knob and tote. Unwind the blade-adjustment nut all the way (it likely will come off). Remove the screws that affix and adjust the frog.
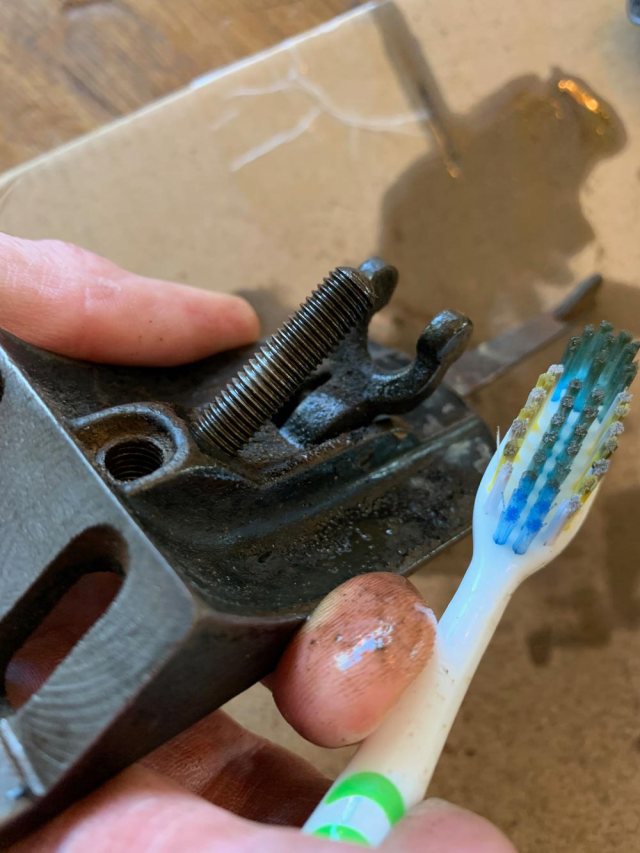
Now fetch some cleaning tools. I use an old toothbrush, a coarse brass-bristle brush and some sort of liquid – Simple Green, mineral spirits, machine oil, WD-40 or anything else that is metal-friendly. Scrub the parts first with a toothbrush and solvent. Then use the brass-bristle brush (soaked with liquid) to clean the threads of every screw down to bare, shiny, lovely metal.
If the tapped holes in the plane are filled with gunk, clean those out with a bristled brush and some liquid. Bare metal is the goal.
Lubricate the screw threads with a light coat of machine oil.
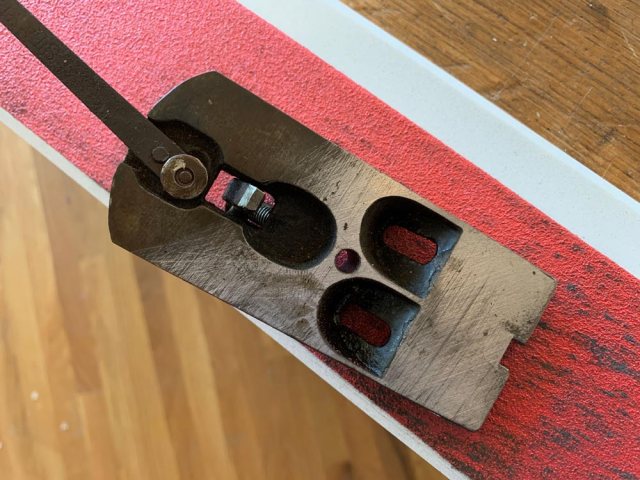
Check the Frog
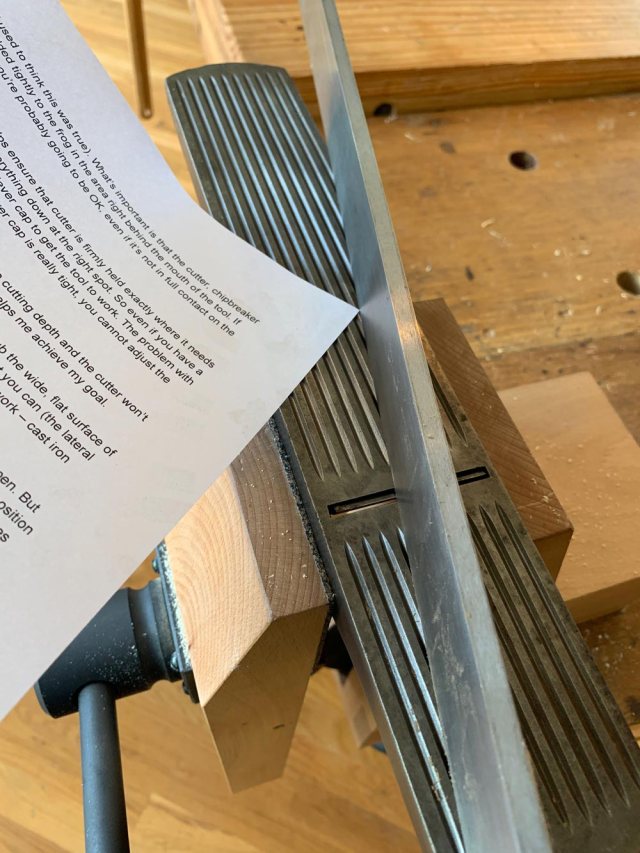
The frog of your jack plane is its heart. The bedding surface for the iron needs to be flat or perhaps slightly concave from end to end. If it is convex, the cutter might (or might not) chatter.
Before you get your panties in a wad about flattening the frog’s bedding surface, it’s important to understand what’s important about the cutter. Does the cutter need to be perfectly bedded on the entire iron? No. Does the cutter need to be bedded at two points on the frog? Not in my experience (though I used to think this was true). What’s important is that the cutter, chipbreaker and lever cap are all bedded tightly to the frog in the area right behind the mouth of the tool. If the cutter is secured there, you’re probably going to be OK, even if it’s not in full contact on the rest of the frog.
Lucky for us, the way a plane works helps ensure that cutter is firmly held exactly where it needs to be firmly held. The lever cap presses everything down at the right spot. So even if you have a crap-ish plane, you can tighten the grip of the lever cap to get the tool to work. The problem with that super-tighten-this strategy is that when the lever cap is really tight, you cannot adjust the position of the cutter. That is a pain.
My goal is to tune the plane so you can both easily adjust the cutting depth and the cutter won’t chatter. I have found that flattening the frog’s bedding surface helps me achieve my goal.
Remove the screw in the middle of the frog (if you haven’t already). Rub the wide, flat surface of the frog on a diamond stone, coarse sharpening stone or some #80 paper stuck to a piece of granite. Flatten it as best you can (the lateral adjustment mechanism will get in the way of doing this easily). This is quick work – cast iron cuts quickly – and the work can only help the tool’s performance.
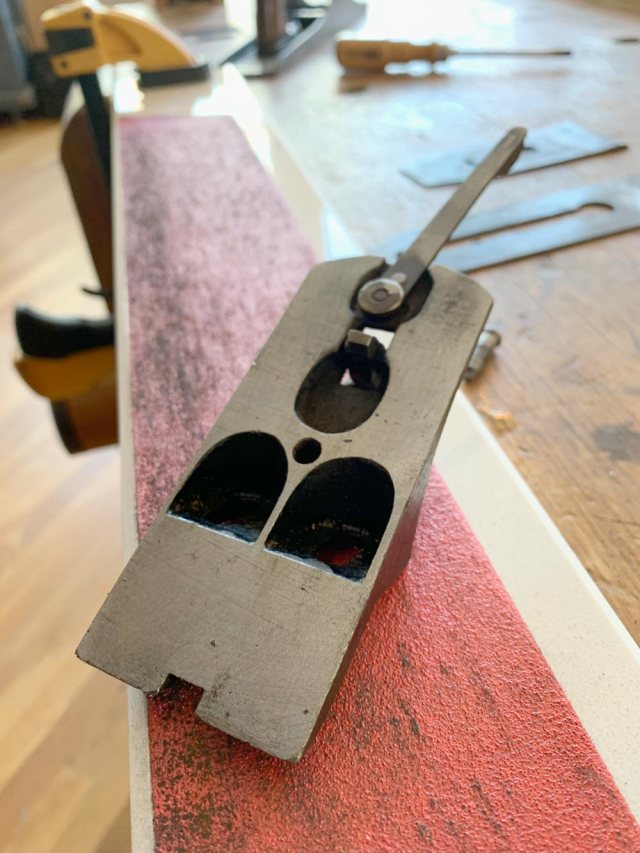
Attach the frog to the plane’s body. Position the frog so the tool’s mouth will be quite open. But don’t position the frog so far back that the plane iron cannot sit flat on the frog. For me, I position the frog so it is in the same plane as the back edge of the plane’s mouth. This position ensures that the iron will have free movement and will sit flat on the frog.
Tighten the frog’s screws tightly. Many people skip this step (by accident). Attach the the plane’s tote and front knob. Assemble the iron and chipbreaker. Secure them with the lever cap. Adjust the adjustment screw in the center of it all so that the cutter will move but is still held tightly.
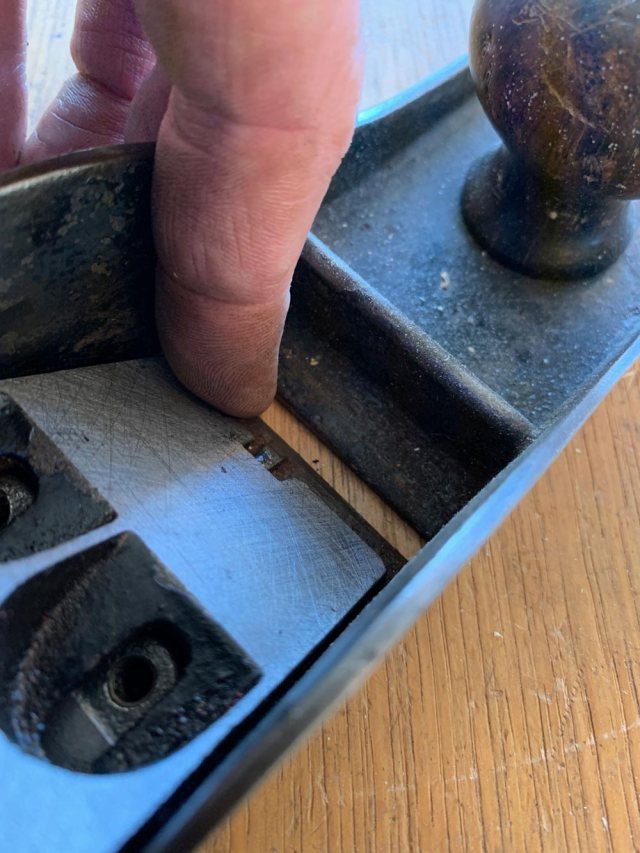
Check the Sole
I hesitate to wade into this thicket. Does the sole have to be NASA flat to work? No. But if I had to choose a plane with a flat-ish sole or an unflat sole, I will choose the flatter sole every time. Bottom line: A little flattening doesn’t hurt. And it might help.
But before you rush out to buy some of the this, that or the other supplies for flattening a sole, give the sole a good gander. Here’s how.
You need a metal straightedge and feeler gauges. Retract the iron so it’s not in the way. Place the plane upside down in a bench vise and squeeze it just enough to hold it in place. Place the straightedge on the sole of the tool and try to fit a .002” gauge under the straightedge at various locations. Move the straightedge around.
After a few pokes with the feeler gauge, you will know what the sole looks like to a .002” feeler gauge.
Switch to a .004” feeler gauge and repeat the test. Then a .006”. Now stop. You now know where the low spots are on the plane’s sole. If you have low spots that a .006” feeler gauge can find (many planes do not) then you might consider flattening the sole a bit.
Here’s how I do it. Please note, I am not a machinist or pretend to be.
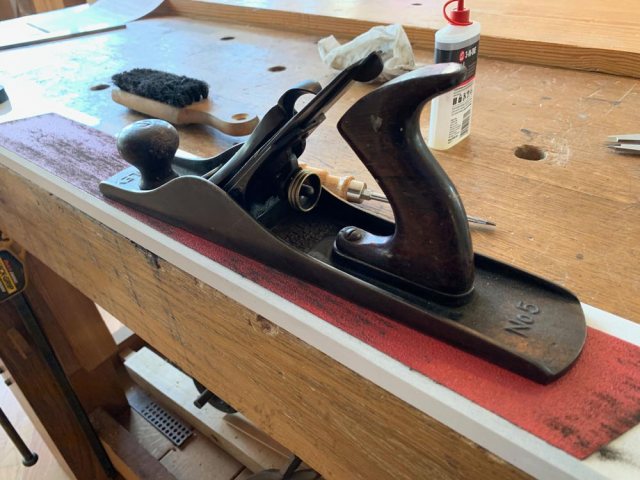
Go to the home center with a nice straight steel 12” ruler and visit the tile section. Find a cheap pile of 12”-square granite tile (usually $4 or less), or a piece of granite threshold (about $9). Probe the pile and search for one tile that is flat. It won’t take long.
Go to the sandpaper section and buy some belt sander paper intended for stainless steel. Usually #80 grit is good. Go to the adhesive section and get some aerosol adhesive (3M makes some). Pay for it all.
At home, adhere the sandpaper to the tile. Now you can flatten plane soles so they are good enough for woodworking. Rub the sole on the sandpaper. Use circular and linear motions. Check your work with the straightedge and feeler gauges. You should be able to get the sole quite flat in less time than it takes to get a pizza delivered.
Clean the sole with oil and a rag. You probably have some grit and crap inside the frog now. So take apart the whole tool, clean it and wait for my next installment on sharpening the iron and preparing the cap iron and chipbreaker.


— Christopher Schwarz
The Jack Plane Series
The Jack Plane You Really Need: Part 1
Clean & True Critical Surfaces: Part 2
Grind the Iron & Fit the Chipbreaker: Part 3
Set Up & Use: Part 4