This is an excerpt from “Chairmaker’s Notebook” written and illustrated by Peter Galbert.
When I set out to make my first chair, there were parts of the process that I did not even know existed. But there was one part that I knew I wanted to do: carve the seat.
I got into woodworking for this kind of fun. Watching the shavings fly as the seat shape comes into focus is hypnotic and thrilling. Making a chair should begin with the various green wood parts so that they will be dry when the seat carving is done, but I suspect that most folks head right to the seat carving and build the rest of the chair around it. And when I started out, I was no exception. I couldn’t even wait to build an actual chair, so I glued up a bunch of 2x4s and used a gouge and a bent piece of steel to hog out a crude seat.
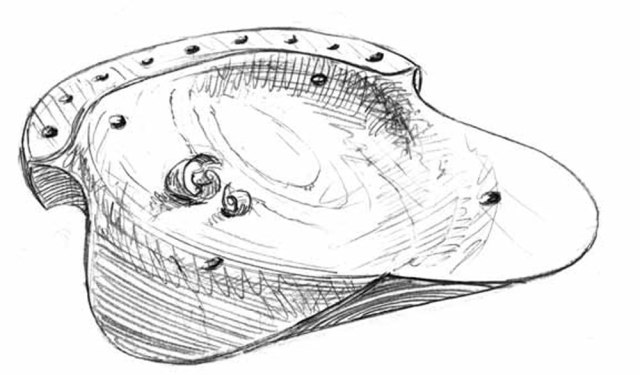
Beyond referring to a seat as oval-, D- or shield- shaped, it actually is an “un-nameable” shape. While it has hollows and humps that follow a distinct logic, there is no simple way to describe it. I think of it as a landscape, full of hills and valleys. To arrive at this complex shape in a consistent and timely way requires a set of steps, each one paving the way for the next. No single step is ambiguous; in the end, the overall shape, while tough to describe, is consistent and clear.
Carving the seat affects just about every surface of the workpiece, so being able to hold the seat in a number of positions is critical. I always leave the extra material adjoining the back of the seat in place until the last step of carving the underside at the back. This way, I can always clamp the waste area without dinging the soft pine, and when I clamp it to the corner of my bench, I can easily move around the seat to come in from the desired direction.
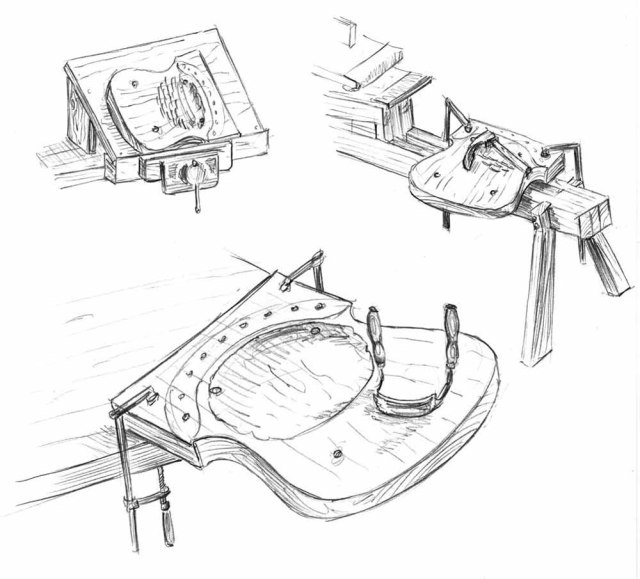
Before I carve under the front edge of the seat, I can clamp the seat between the vise’s dog and a bench dog because the material being compressed gets carved away later. For the initial adze work, I clamp the seat to my shavehorse, which puts the blank at a comfortable height to use the small hand adze that I prefer.
I’ve also had great success using a podium-type support that sits on my bench. This is great when using the small hand adze because you can flip the seat in various orientations without having to move clamps, plus the force of the blows is countered by the lip at the bottom of the holding platform.
When Steel Meets Wood –Tips for Clean Cuts
Once you’ve begun to envision the wood as a bundle of fibers and understand how a tool is configured to cut them, it’s time to put these two bits of knowledge together to get proper results. Regardless of which type of tool you are using, it’s important to know there is always a technique that can deliver clean, controlled cuts.
Clean results when carving are usually achieved by moving or pointing the tool in a specific direction. Cutting in the wrong direction usually leads to rough and uncontrollable results as the tool slips between the fibers and causes the wood to split in advance of the cutter.
In the chapter Shaving & Shaping Parts, I introduced shaving, which is like controlled splitting, but for now, let’s focus on achieving clean cuts when cutting across the fibers.
Looking back to the structure of the wood, it’s important to note that any time you see a surface pattern other than long strips running perfectly from one end of the board to the other, you are looking at exposed end grain. This is the common “cathedral” patterning seen on the surface of most sawn boards. Because the surface has exposed end grain, a specific direction of cut will yield good results.
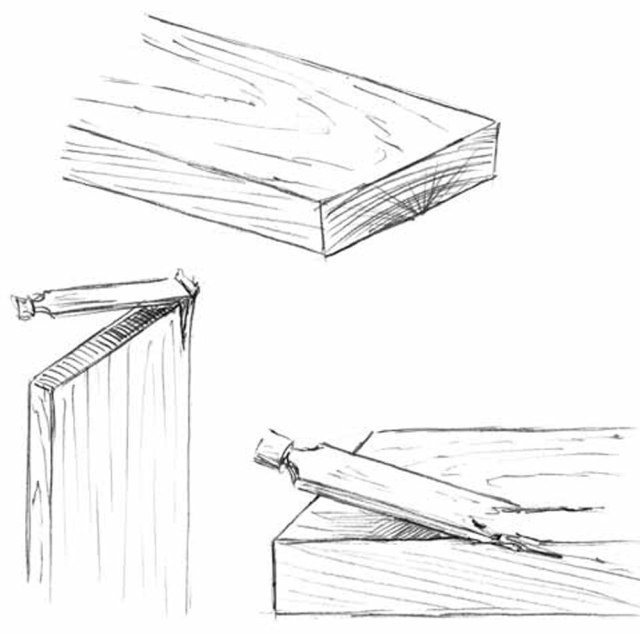
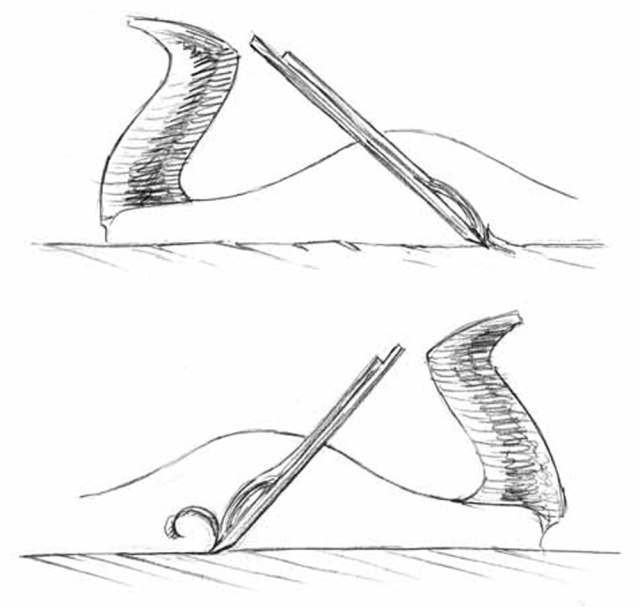
When planing a board, the direction that the fibers ascend from the lower face determines the best direction to plane the surface. This is usually referred to as cutting “downhill.”
When pushed “uphill,” the cutting edge slides between the fibers, follows them and causes a splitting action to occur ahead of the cutter. The damage is limited by the depth of cut, the sole and the chipbreaker, but the increased effort and diminished surface quality are not desirable.
A favorite comparison when contemplating planing is to think of petting a cat or dog. If you stroke the fur from head to tail, it lies down smoothly and your hand never slips down to the skin. If you pet from tail to head, your hand slides under the fur, causing the fibers to stand up and the animal to get annoyed. I’m pretty sure we’ve all had a cat and board glare back at us after such a transgression.
While you can determine the direction of cut based on the orientation of the growth rings and the pattern on the faces and edges of the board, this can lead to confusion because boards from twisted or bowed logs can have multiple direction changes on each surface. In such cases a few light cuts are best to help determine the best cutting direction for each area.