When Chris Schwarz asked me to write about what he “got right” in his kitchen (as though there were anything he didn’t get “right” – insert weeping-with-laughter emoji) and what I’d do differently, my first thought was Look, it’s your kitchen. If you designed it and are happy with how it works, I have no place wading in with my two cents.
On the other hand, Chris appreciates the value of such discussion in sharpening how we see our work, whether it be photography (at which I suck, as Chris can attest) or the design of a workbench or chair. We learn by critiquing our own work and listening to the criticisms, as well as affirmation, of others.
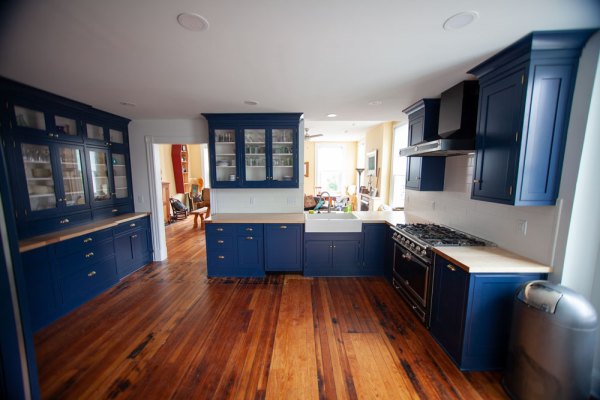
So the first thing to say is: This is a gorgeous kitchen, and I can only imagine that Chris and Lucy are thrilled to have it. I wish I had that lofty ceiling and so much space, that glorious sink and that stove (though the six-burner La Cornue would be arguably be wasted on someone who would happily eat salad or homemade burritos with refried beans six nights a week). My husband would give his eye teeth to have a French-door-style fridge with freezer drawer below; we used to have a basic version of this type from Sears, before I made my most-expensive-purchase-ever, a Big Chill retro-style fridge, the “Surprise!” arrival of which brought us closer to breaking up than anything else has in our 14 years together. The dark blue paint is crisp as all get out, especially in contrast to the white interiors. The lacquer-free brass hardware is definitely the way to go (unless you’re emulating the in-your-face glitz of kitchens and baths from the 1980s). I applaud the preservation of the floor, complete with burn marks that record an important moment of the building’s history. And the maple counters and pantry door certainly fulfill Chris’s wish to give the kitchen a furniture maker’s touch.
But I am reasonably good at doing what I’m asked to do (if not in the case of photography), so in the interest of promoting Kochvergnuegen, here are a few points I would bring up if a client asked me for pros and cons regarding some of the details here.
Painted cabinet interiors
Cabinet interiors offer all kinds of creative opportunity. You can make them match the exterior, use contrasting colors or even apply wallpaper to the backs. In cabinets with glazed doors or open shelves you’ll get to enjoy the interior treatment all the time. But don’t ignore interiors that are closed off from regular view – a splash of color when you open the door to make coffee first thing in the morning can be just the zing you need.
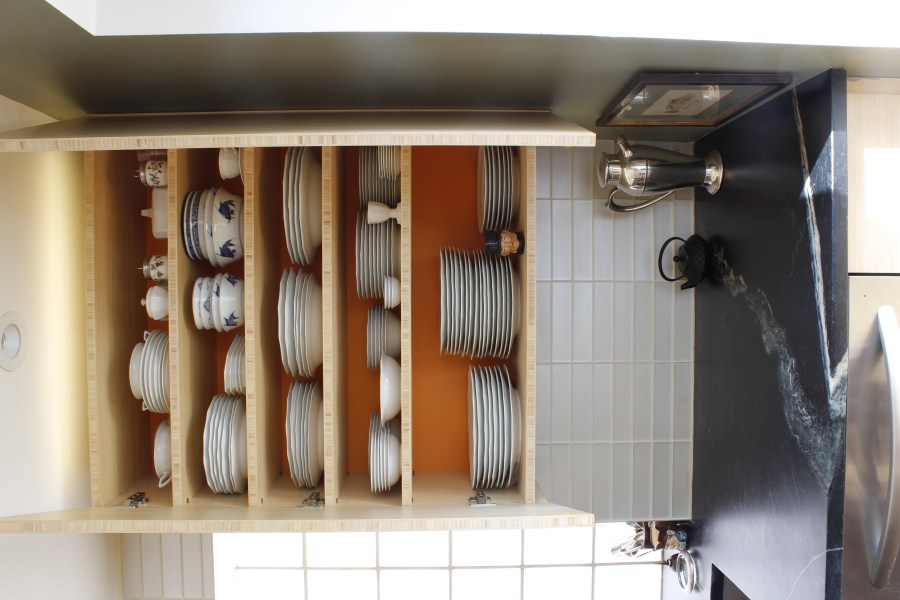
I do point out to clients that opaque paint tends to show wear more than natural wood, the grain of which helps distract the eye from scratches and dents. If you’re careful about taking things out and putting them away, you’re not likely to cause significant damage – and even if you do, you can touch it up (or savor the “patina”). Alternatively, you may consider applying shelf paper to shelves or use mesh liners to prevent scratches.
Open center
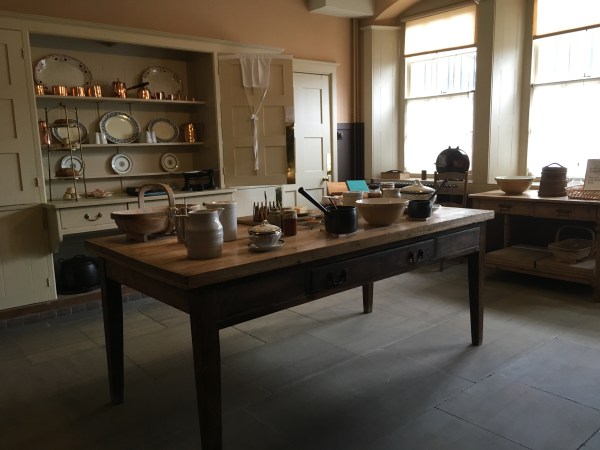
Although I don’t have the dimensions of the room, it does seem to have a lot of open space in the middle. At least one person asked in the comments on Chris’s original post whether he plans to install an island. My understanding is that he does not. Were he interested in adding a central workspace, in view of his desire to respect the historic architecture of the building, I would suggest a work table rather than an island; work tables were basic fixtures of 19th-century kitchens and have the advantage of being mobile, whereas most islands do not. Islands also tend to be more massive – fine in some kitchens, but in this one, a table with drawers (and perhaps an open shelf below) would preserve the sense of open space while providing a handy staging point between the fridge and stove, in addition to a central visual focus.
Cabinets on counter
My favorite part of the Schwarz kitchen is the wall of floor-to-ceiling built-ins with a deeper central section. The one caveat I always mention to clients is that the counter in such cases becomes more decorative than functional; if you put anything on it, you have to move it to open the doors (or drawers, in this case). One way around this is to use sliding doors, as some historical cabinets do, but sliding doors have their own disadvantages. If you’re building the kitchen yourself and love this look, by all means, go for it. But if a client asked me to build solid maple counters with breadboard ends for this kind of scenario, I’d point out that they’d be paying a lot of money for a feature that’s largely decorative.
Recessed lights in ceiling
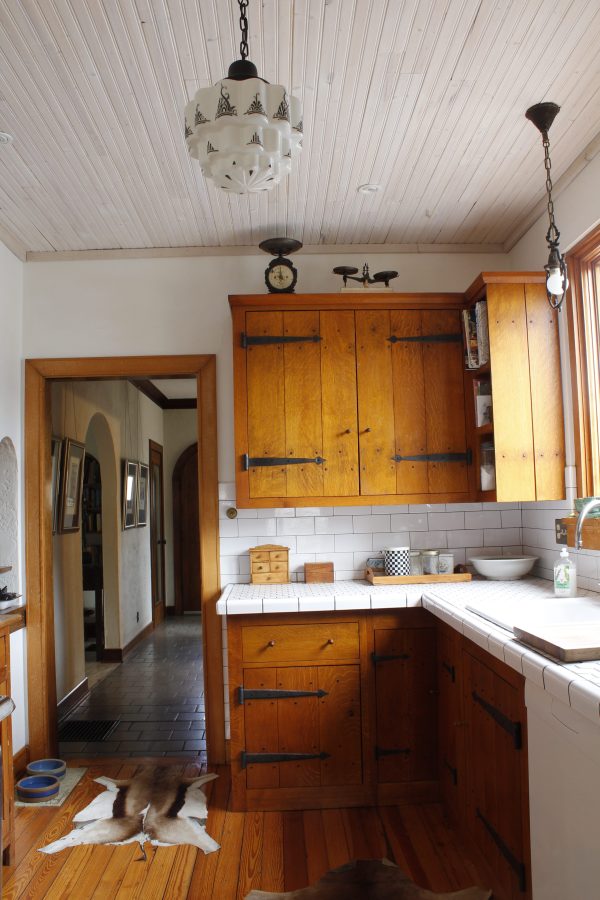
Recessed lights are practical and cost-effective, but they’re a mid- to late-20th-century intrusion on a historically inspired space. For what it’s worth, my husband adores them. If I die before he does, he’ll probably retrofit them in our kitchen ceiling, which has just one central schoolhouse fixture. Other lighting comes from a double sconce over the stove, a salvaged pendant over the sink and a couple of under-cabinet fixtures.
In Chris’s kitchen I would have suggested a central ceiling fixture with a few additional pendants, as appropriate, and task lighting under the upper cabinets (which are probably there, even though we can’t see them).
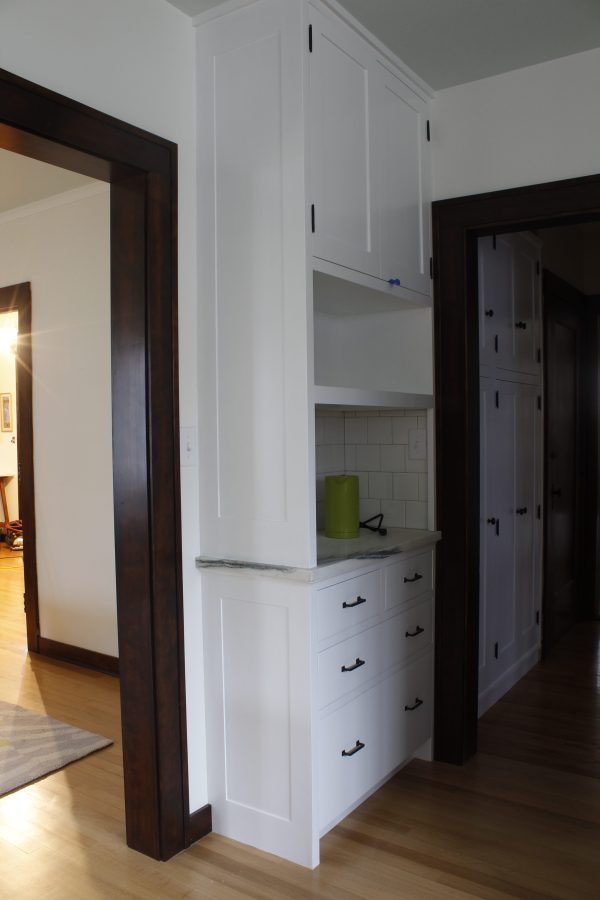
Applied end panels
The cabinets’ end panels, as well as those of the fridge housing, are made the commercial cabinetmakers’ way; they’re applied, instead of integral. This makes for a busier look, with unnecessary lines. To anyone familiar with historical built-ins, this detail says “hello, I am applied.” As someone whose livelihood depends largely on work for kitchens, I understand that making end panels this way is more efficient — and so, cost-effective — than taking the time to make them look integral to the structure. Most of the end panels in kitchens I do today are applied, but I take pains to make them look as though they’re not.
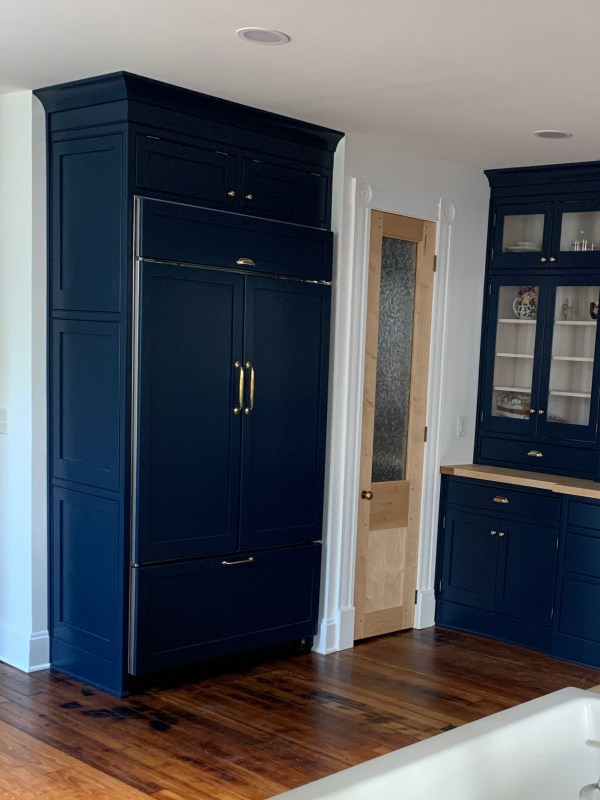
Inside corners
Instead of incorporating a lazy Susan in the corner to the left of the stove (see the image at the top of this post), I would have recommended sacrificing the inside corner space and providing access to that cavity from the living room. “Kitchen Think” includes a lengthy analysis of the actual footage (square and cubic) that storage devices such as lazy Susans, corner drawers and corner optimizers make available. In most cases, it’s far less than you’d imagine. And the storage area that most of these supposedly space-saving devices end up providing is less than ideal, being oddly shaped or constrained by structural parts.
When kitchen space is seriously limited (and depending on the specific types of items you want to store), a corner storage device can make sense – especially in cases where you can’t access the back of the corner from an adjacent room. This kitchen, though, has tons of storage space (at least, compared to many of my clients’ kitchens), in addition to the ideal scenario in which to make optimal use of the corner by accessing it from the neighboring room. I would have recommended a stack of narrow drawers at the left of the stove (going just to the inside corner) – a perfect spot to keep cooking utensils, a garlic press, hotpads and perhaps a drawer with a built-in knife rack (see Narayan Nayar’s elegant design in Chapter 5).
Why drawers, instead of a door? In most cases, I find drawers more practical and convenient for base cabinet storage. A door with one or two shelves inside certainly costs less to build in a professional shop, but it requires you to get down on the floor to extract things from the bottom shelf (and even from the farther reaches of shelves above that).
Similarly, I would have suggested a set of drawers to the right of the sink – depending on the width available. In a kitchen without a dishwasher, a drawer by the sink is perfect for storing silverware; where there’s a dishwasher, I’d put the silverware drawer next to it. This is also the ideal location to store dishtowels, so you can grab one when your hands are wet. The one crucial caveat to putting drawers on both flanks of an inside corner is you must make the face frame stiles wide enough to allow the drawers to bypass each other when opened – and don’t forget to factor in the protrusion of the drawer pulls! (There’s an entire chapter in the book on the subject of what Chris calls butt savers.)
Bottom line: Chris, I’m pretty sure that Mark would prefer your kitchen to ours – even without the stove.
— Nancy Hiller, author of Kitchen Think and Making Things Work