This is an excerpt from “Make a Joint Stool from a Tree” by Jennie Alexander and Peter Follansbee.
Now we can return to the framing parts, starting with the stiles. The first step is to layout the mortises. We’ll outline these steps one at a time because it can get confusing. We will call the mortises for the front and rear rails “straight” mortises, those for the canted ends of the stool we will call “angled” mortises.
Stack the four stiles together, with their beveled inside corners touching, and with radial faces up.
These radial faces become the “front” and “back” faces of the stool. Take one stile, and work on its radial face.
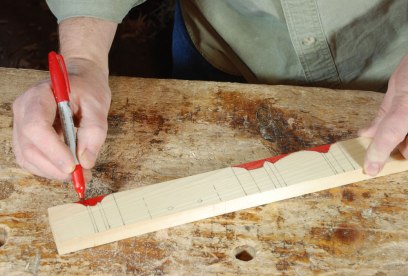
To lay out the stiles’ square blocks and the straight mortises, it’s easier to use what a carpenter now calls a “story stick” that is marked with the stiles’ details, rather than working from paper drawings or patterns. This shop-made stick records the markings that are then transferred to the stile. We have made these sticks to record different stools. The locations and heights of the squared blocks, turning details and positions of mortises can all be taken from the stick to the stile. It is best to mark ONE stile from the stick, then the other three stiles from that first stile.
Make sure the foot of the stile is trimmed square. Line up the foot of the story stick and the feet of the stile. With an awl, mark the limits of the square blocks and scribe these marks across all four faces of the stile, with one exception – the top of the stile is marked only on the radial face and the corresponding inside tangential face (where the straight apron mortise is located).

Now line the stick up on the inside face and mark the locations of the mortises on this tangential face.
One thing to keep in mind is that the top of the apron mortise is not at the same height as the top of the stile. This mortise drops down about 3/4″ from the stile’s top end. Eyeball the top of the apron mortise and scribe it with the awl and square.


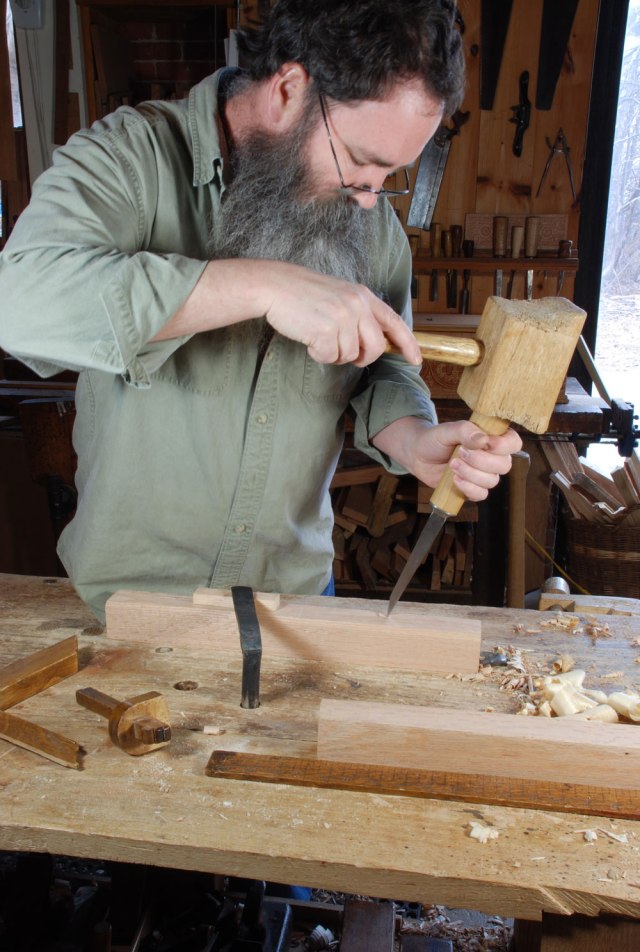
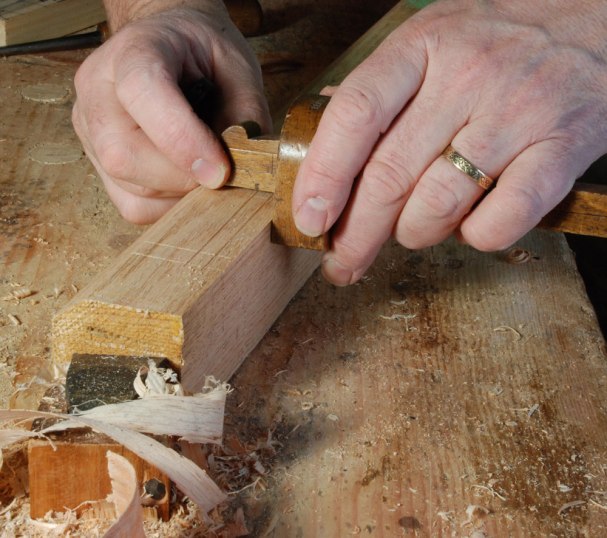
The next step is to mark the mortises with the mortise gauge. To set the gauge, make a mark with your chisel’s edge perpendicular to, but right against the stile’s arris. Next, move over one chisel width and bear down hard enough to make a mark in the wood. Then set the pins of your mortise gauge according to the location of this second chisel mark. The result is a mortise that is set in from the face of the stock the thickness of the chisel. Our mortises are usually 5/16″, set in from the face 5/16″. This spacing is based on studies of period work; 5/16″ is almost a standard from what we have seen.

The Angled Mortises
To find the location for the angled side mortises, use an adjustable bevel set to the desired flare angle. A slope of 1:6 is what we have used on several stools. Our studies of 17th-century stools show flare angles right around that figure, some less, none more. To set the bevel, set a straightedge on a framing square, positioning it at 1″ on one leg, and 6″ on the other. Then adjust the bevel to this angle and lock its nut to secure the setting. You can then scribe this angle on a piece of wood, or even scribe it on the wall. Like the adjustable gauges, the bevel can lose its setting if bumped. Having the angle scribed somewhere makes it easy to reset it. Alexander turned an adjustable bevel into a fixed one by threading a bolt through its stock and blade.
To lay out the side mortises, you must carry the line that designates the top of the stool from the front radial face across the side tangential face. Set the bevel with its handle on the front face of the stile. Line it up with the marked top of the stool, with its angled blade pointing upwards on the other outside face of that stile. Scribe this line with the awl.
Then use a square to carry this line across the other inside face. So the sequence is square, bevel, square. Remember that it’s best to carry the lines across the outside faces; the inside faces are unreliable. This layout is both simple and complicated at the same time. Sometimes it helps to stand the stile up and tilt it as it will be in the finished stool. Then you can easily visualize where the angled mortises are and how they rise up higher than the straight mortises.
You can repeat this process for the top edge of the stretchers’ mortises. Or you can mark this from the story stick, this time lining up the top of the stool with the scribed line that designates the top of the side apron.
Now mark the mortises’ height and width on these faces of the stile. After you mark out two stiles, lay them side by side and check that they agree. A front or rear pair should have their radial faces matching, with the straight mortises aiming at each other, and the side, angled mortises rising up toward the top of the stool.
— MB