
This is an excerpt from “Chairmaker’s Notebook” written and illustrated by Peter Galbert.
Paint has come a long way from the toxic lead paints of the original Windsors to the stringy enamels of the 20th century. I paint my chairs with milk paint, and while it was not the traditional finish for Windsors, it does a great job of coloring the wood without obscuring the texture. One problem with milk paint is that its manufacturers tend to describe mixing and using it in a way that creates a crude “country” finish. I don’t want this for my chairs, so I mix the paint thinner than recommended and follow a multi-coat process to get the refined look I want.
When done properly, the grain and texture of the wood are clearly visible, and the desirable tool marks and edges are sharp and crisp. Not only is the warmth and depth of the wood present, but it is deepened. Over time, normal use will wear the paint, exposing the edges of the chair and highlighting the shaping. The overall effect is far more striking than one dominated solely by the surfaces and colors of the wood.
Before launching into surface and paint preparation, I feel compelled to talk about samples. Committing making sample boards might just be the toughest lesson in all of woodworking. But until you have a sample – and I mean a completed sample – that you are pleased with, it is more than likely that you will be disappointed in the results on the actual piece.
When working with a new finish, I make samples on the various woods and surface preparations of my piece. I observe all the normal drying times, steps and layers. Lots of notes will help you remember the steps and measurements. Once I love the results, it’s time to work on the actual piece.
Surface Preparation
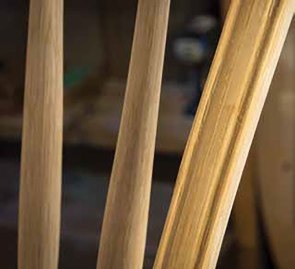
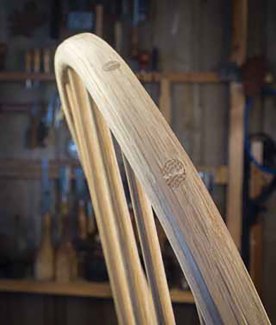
Surface preparation is vital to getting good results. Any surface that was shaved with a sharp blade, such as a drawknife or spokeshave, is ready for finishing without any further preparation – save making sure that it is free from dirt or grime. This is because the cutting action shears the fibers cleanly without compressing the grain. Even parts that have been put through the steamer will show no raised grain where they were shaved with a sharp tool.
Areas that have been scraped and sanded will have some degree of grain compression that will show up as raised rough fibers on the surface once they contact either water, water-based stain or water-based milk paint. For these areas, I sand to #220-grit, then wet them to raise the grain. This is often easier to do before assembling the chair.
It’s important to let the surface dry and harden; letting it sit overnight is best. Then I lightly sand with #220-grit paper, being careful not to apply too much pressure. Instead, I let the sandpaper cut the fibers with multiple light passes. These areas will most likely show raised grain again, but I sand them after the first coat of paint has soaked into them and hardened the fibers. One sanding after the first coat of paint is usually enough, but I inspect those areas carefully to ensure that I am happy with the surface after paint is reapplied.
My turnings in the undercarriage are finished with a skew, but because any burnishing that takes place may resist the paint sticking, I sand lightly with #320-grit while the piece is on the lathe. Be sure to remove the tool rest and any loose clothing before sanding. I also wear a respirator because the fine dust is dangerous. There should be no surface preparation required after that.
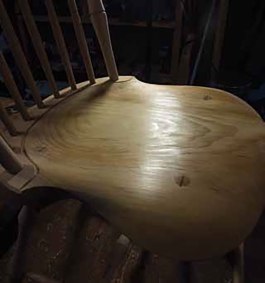
The seat is perhaps the most critical place for surface preparation. Pine tends to compress when scraped, and it might also contain considerable sap or pitch. It is difficult for paint to adhere to sap, so I heat the surface of the seat with a heat gun until I can see the pores with sap in them liquify. Then I rinse the seat with naptha or grain alcohol. Always wear gloves when handling solvents. I repeat this if the seat seems quite pitchy. Some manufacturers suggest sealing the seat with a coat of shellac or using an acrylic additive to the milk paint to encourage solid adhesion. I have done both, but have found that the brand of milk paint that I use, from the Real Milk Paint Company, doesn’t require help sticking to the surface. If I do use an additive, I only use it on the first coat on the seat and nowhere else on the chair.
If your chair has been sitting around for a while unpainted, oxidation and dust will have contaminated the surface and you might consider wiping the whole chair with solvent such as grain alcohol or naptha before painting.
— Meghan B.