This is an excerpt from “Ingenious Mechanicks” by Christopher Schwarz.
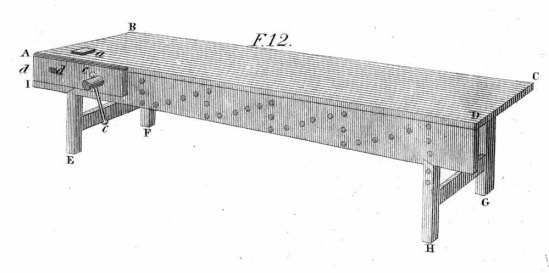
The first time I saw the bench in Peter Nicholson’s “Mechanic’s Companion” (1831), I thought: That’s not right – the benchtop has only a planing stop. There are no holes for holdfasts, dogs or other workholding devices. While the front of the bench features a screw-driven face vise, I thought surely the illustrator forgot to draw in some details.
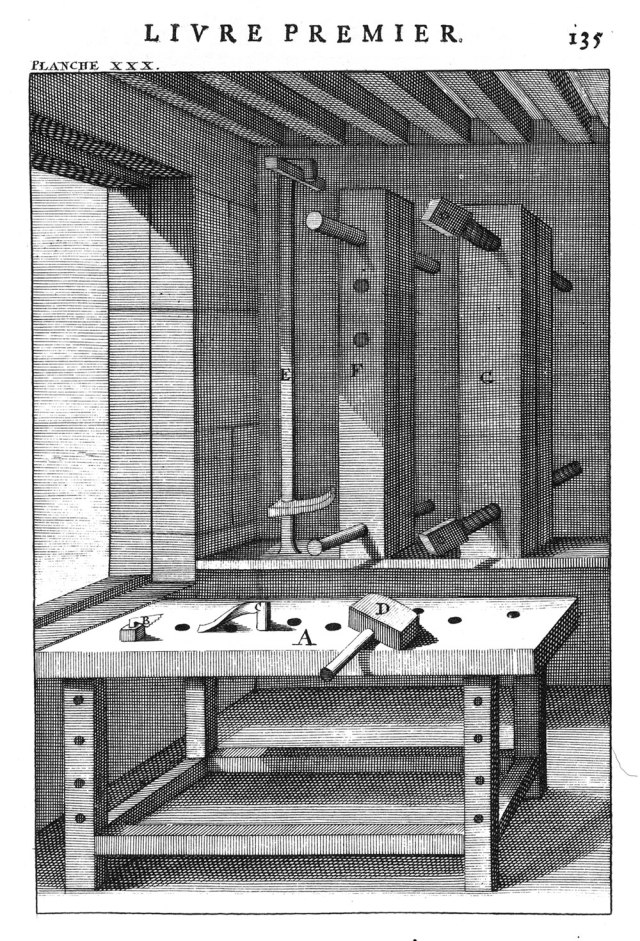
Then I got a copy of André Félibien’s “Des Principes de L’Architecture” (1676-1690) and the workbenches shown there (below) are also stripped down. They feature a planing stop and some holes in the top and legs for a holdfast. As I worked my way backward through the visual record of workbenches in technical manuals and paintings, the message was clear: Early workbenches had simple workholding.
It would be easy to assume that early benches are simple because the screw vise hadn’t been invented. Yet, large scale screws show up in early Greek, Roman, Egyptian and Assyrian writings and drawings. And archaeologists have found evidence of screw-driven vises (likely for metalworking) at Augusta Raurica, a Roman site in Switzerland active from 44 B.C. to 260 C.E.
They knew about screws. Perhaps the screws were too much trouble to make for a woodworker’s workbench. Or they simply preferred to work without them.
So, I stopped using a tail vise and didn’t miss it one bit (I still don’t). I began to plane up panels with only a planing stop and became quite fast at processing stock. This small taste of success drove me to experiment with pegs, wedges, battens and notched sticks. Things that looked like they could never hold your work (such as a doe’s foot) worked brilliantly.
I am convinced there is a world of workholding out there that doesn’t require gizmos, but instead requires a little cleverness and some basic skills with the tools. The following account only scratches the surface of what’s out there. Every tradesperson, from the armorer to the shoemaker to the block builder, had simple ways of holding the work that don’t look like much to the modern eye. These are just a few of the devices that show up repeatedly in the historical record.
Planing Stop
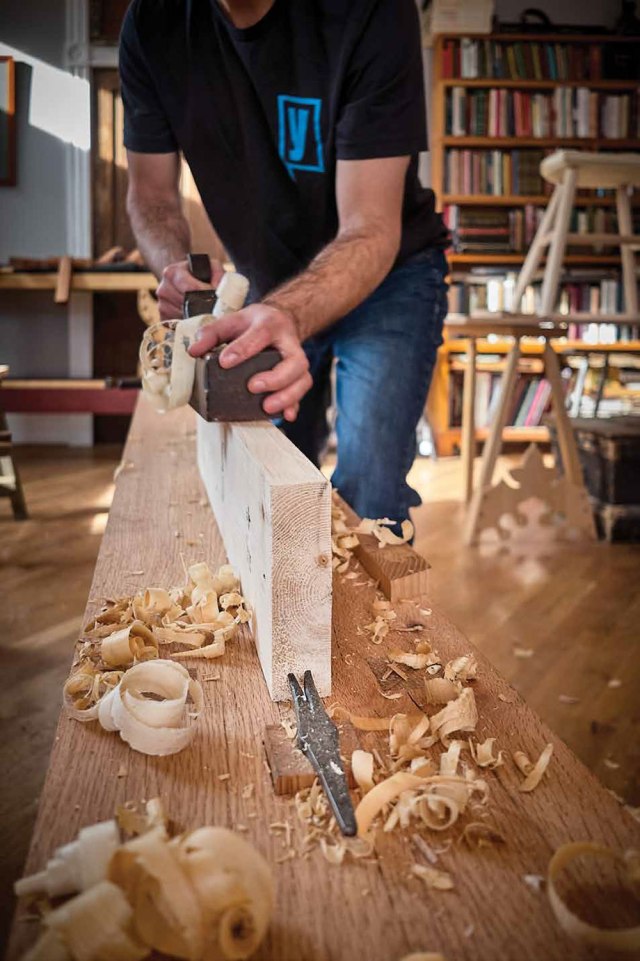
On early workbenches, the simple planing stop is the foundation for all the other bits of workholding for woodworking. In fact, some benches are equipped with only a planing stop. There’s a lot you can do with a planing stop and a little skill.
Most planing stops are comprised of a square piece of wood that is long enough to penetrate the benchtop and give the woodworker a lot of height for planing boards on edge – 3″ x 3″ x 12″ is a typical size.

The stop is adjusted up and down with hammer blows so it needs to be a durable wood – oak is typical – and dry.
You might think that fitting the planing stop requires you to consider how wet the benchtop is and the current season. Will the stop and benchtop (or both) shrink as they dry? Or, if the stock is bone dry, will that component swell during the humid season? Most bench builders have a slab that is somewhat wet that might take years to acclimate to the shop, plus stock for a planing stock that is at equilibrium with their shop.
There are formulas and lots speculation for how tight or loose to make things. I ignore it.
When I fit a planing stop, I assume that I’m going to have to adjust it later on if it becomes too tight or make a new one if things get too loose. So, I focus on getting a good snug fit that day. I want the stop to move about 1/8″ with each heavy mallet blow.
After I get that fit, I simply pay attention to how it is working during the months ahead. If the stop becomes almost impossible to move, I remove it and plane it a tad. If it’s too loose you can glue some veneer onto the existing stop or make a new one. In time, the wood will settle down and your planing stop will do the same.
— Meghan B.